Running Jupyter Notebook with Apache Spark on Google Cloud Compute Engine
Apache Spark is a powerful open-source cluster-computing framework. Compared to Apache Hadoop, especially Hadoop MapReduce, Spark has advantages such as speed, generality, ease of use, and interactivity, etc. For Python developers like me, one fascinating feature Spark offers is to integrate Jupyter Notebook with PySpark, which is the Spark Python API. Unlike Hadoop MapReduce, where you have to first write the mapper and reducer scripts, and then run them on a cluster and get the output, PySpark with Jupyter Notebook allows you to interactively write codes and obtain output right away.
In the developing phase, before distributing the computing work onto an online cluster, it’s useful to have a workspace on hand so that we could first write and test codes or get some preliminary results. The workspace could be our local laptop, or some low-cost online cloud service like Amazon Web Service or Google Cloud Platform. While we can install and configure Spark and Jupyter Notebook on Mac by running a Linux instance via VirtualBox, which is probably the most straightforward way. It annoys me a lot because my Mac only has 2 cores and 8G memory, the long-waiting setup and dramatic performance deduction finally depleted my patience and led me to turning to an online cloud service.
I have used both AWS and Google Cloud for some projects. I don’t want to compare the two here since they are both excellent online cloud service providers which offer tremendous online cloud products. In this post I’ll show you how to install Spark and Jupyter Notebook and get them ready for use on a Google Cloud Compute Engine Linux instance. It should be similar if you decide to use AWS EC2 instance instead.
Prerequisite
Before we go ahead, I assume you already have some experience with Google Cloud Platform as well as Jupyter Notebook. This article is not a primer for those starters with no or little online cloud service and Jupyter Notebook experience.
Install and set up
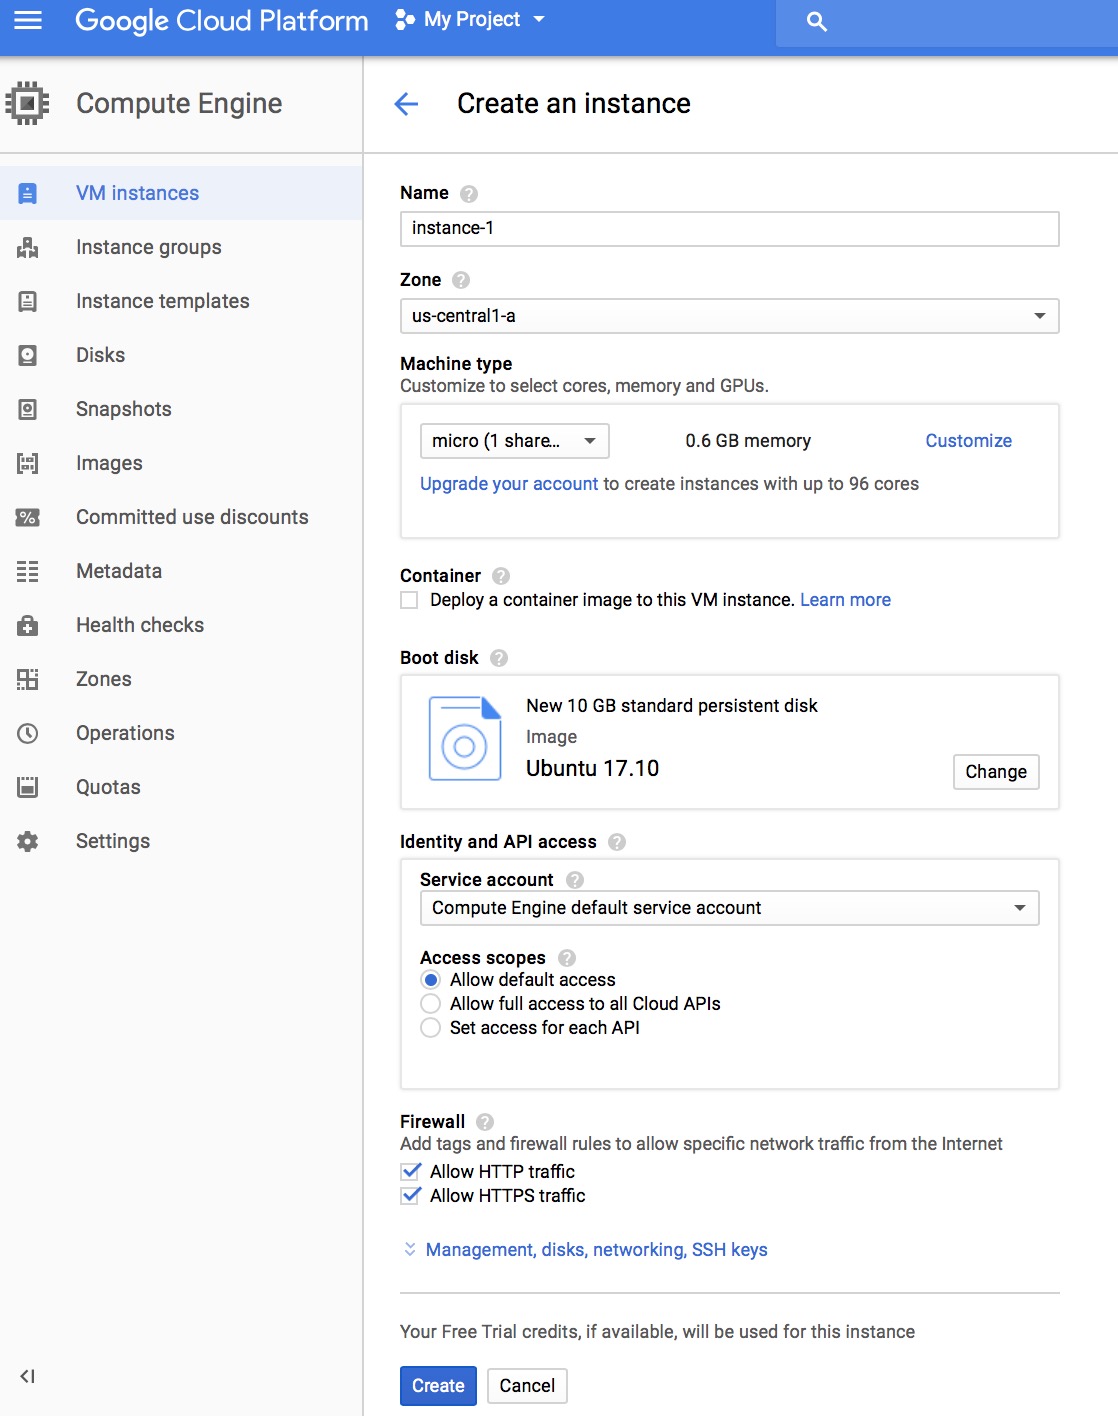
1. Set up a Google Cloud Compute Engine instance
The first step is to create an Compute Engine Linux instance, make sure you select f1-micro as the machine type, as this is the only free-tier machine type provided by Google Cloud. Check Allow HTTP traffic and Allow HTTPS traffic, as the Jupyter Notebook will be accessed via the browser.
2. Install supporting packages and tools:
Connect to the Compute Engine Linux instance via ssh:
$ gcloud compute ssh instance-1
Install pip, which is a Python package manager:
$ sudo apt install python-pip
Install Jupyter:
$ sudo -H pip install jupyter
Intsall Java runtime environment, since Spark is written in Scala, and Scala is run on JVM:
$ sudo apt-get install default-jre
Install Scala:
$ sudo apt-get install scala
Install py4j library, which connects Python to Java:
$ pip install py4j
3. Install Spark library
With all the above-mentioned tools and packages installed, next we could install the actual Spark library. We go to the Apache Spark download webpage, select the latest Spark release version, and click the tgz file, you will be redirected to a download page, copy the shown link address. Then go to terminal, and run the following command, paste the link address:
$ wget http://apache.mirrors.pair.com/spark/spark-2.2.1/spark-2.2.1-bin-hadoop2.7.tgz
Unzip the tgz file:
$ tar -zxvf spark-2.2.1-bin-hadoop2.7.tgz
Now, your spark library is unzipped into a directory called spark-2.2.1-bin-hadoop2.7. Get the path of this directory, we’ll use it later:
$ cd spark-2.2.1-bin-hadoop2.7
$ pwd
/home/shuzhan/spark-2.2.1-bin-hadoop2.7
By default, PySpark is not on sys.path, but this doesn’t mean it can not be used as a regular library. We can address this by either symlinking PySpark into our site-packages, or adding PySpark to sys.path at runtime. The Python package called findspark does exactly the latter. Install findspark by running the following command:
$ pip install findspark
4. Open a Jupyter Notebook server:
$ jupyter notebook
From the terminal, you’ll see something like this:
Copy/paste this URL into your browser when you connect for the first time,
to login with a token:
    http://localhost:8888/?token=fe773099192f7a62fbbedd18569aaabb8748b8f7355e2304
The shown URL is important, we’re gonna use this URL to login to the Jupyter Notebook. But before we do that, we need to create a login to the Compute Engine instance the second time.
5. Connect to the instance again
Do not close or exit the first terminal, open another terminal, type the following command:
$ gcloud compute ssh instance-1 --ssh-flag="-L 8888:localhost:8888"
This will redirect data from the specified local port, through the secure tunnel to the specified destinatin host and port.
6. Login to Jupyter Notebook from your local browser
Now, you are ready to login to the Jupyter Notebook from your local browser. Open a browser, either Safari or Chrome, copy and paste the URL mentioned in step 4. You should now login to the Jupyter Notebook.
7. Set up PySpark with Jupyter Notebook
In order to set up PySpark with Jupyter Notebook, we create a python notebook. Type the command:
import findspark
findspark.init('/home/shuzhan/spark-2.2.1-bin-hadoop2.7')
The findspark module will symlink PySpark into site-packages directory. You need to specify the path of the Spark directory we unzipped in step 3.
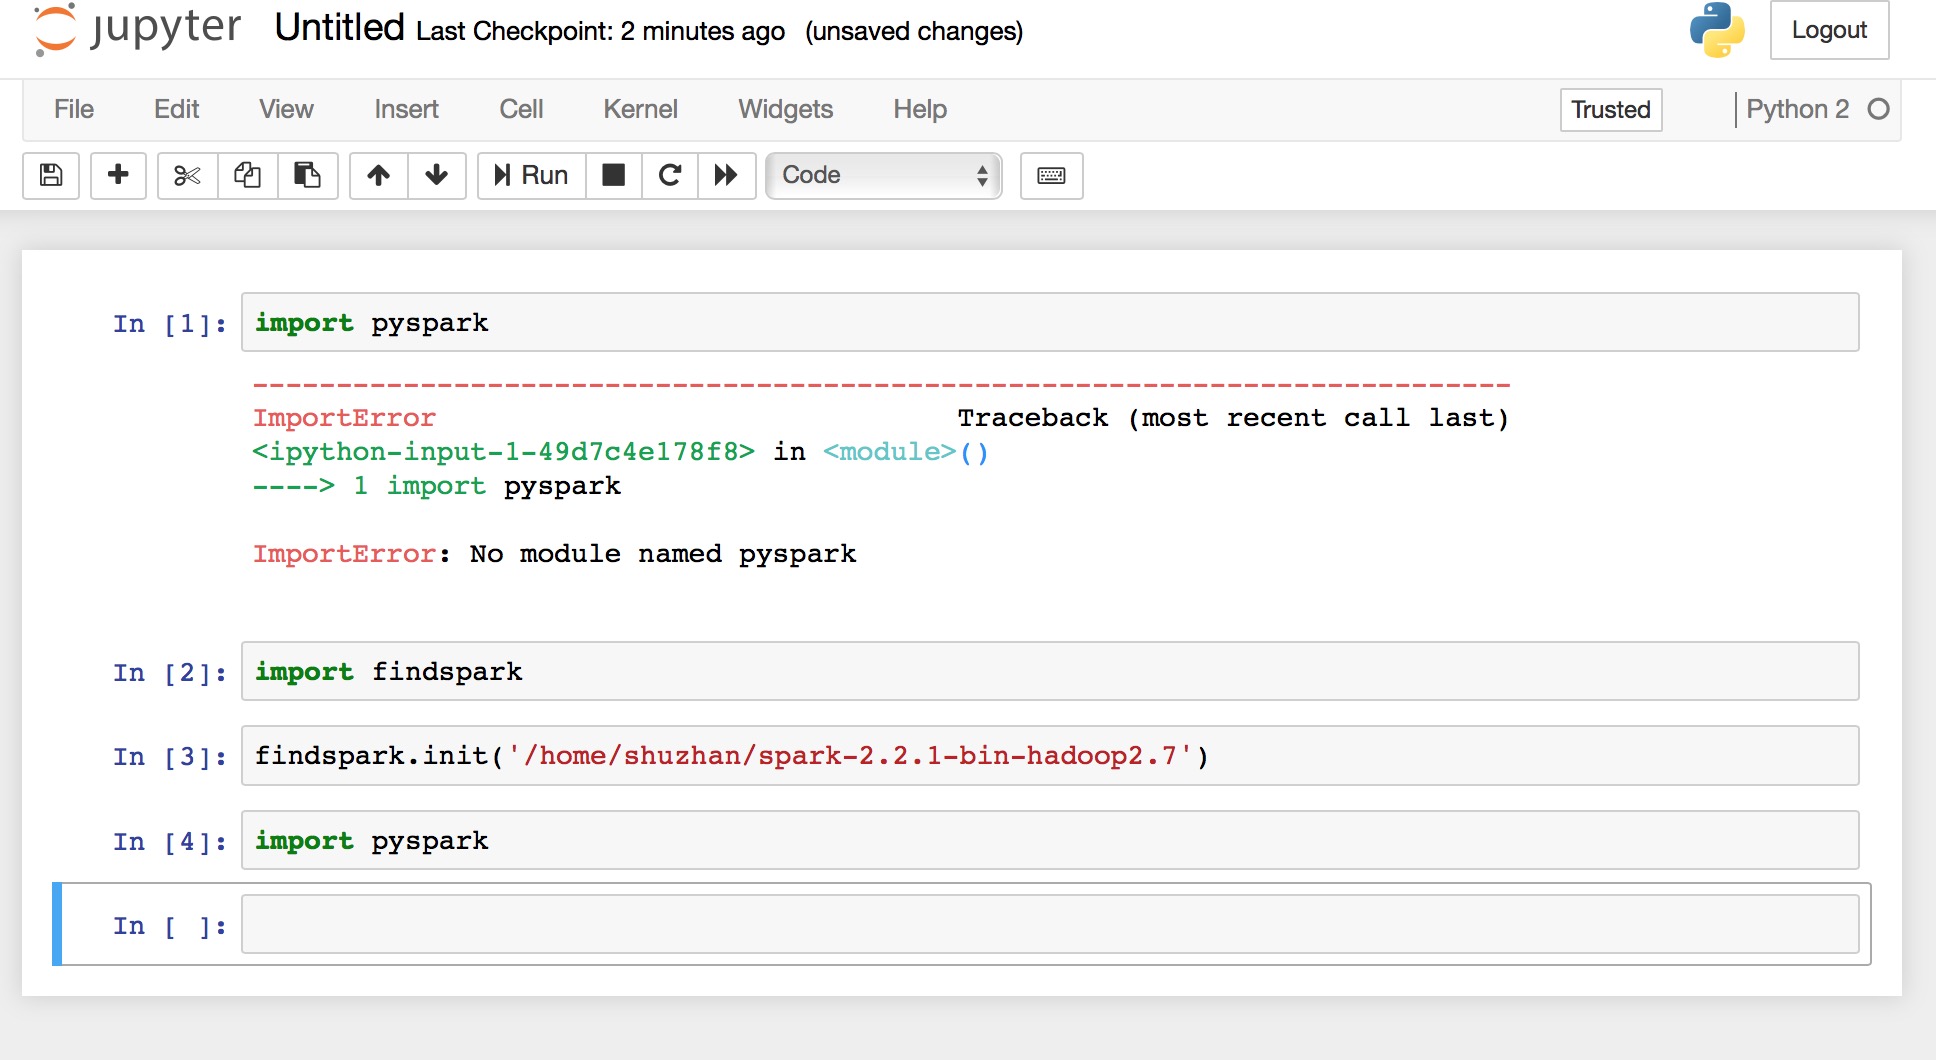
Now, if you type import pyspark, PySpark will be imported. And you are now up to speed and good to play with Spark using Jupyter Notebook.